Difference between revisions of "Biographic Information Questionnaire"
| Line 65: | Line 65: | ||
| <span style="background:white; float:left; border: 1px solid #000000; padding:5px"><font size = '4'>[[Questionnaires|Previous]]</font></span> | | <span style="background:white; float:left; border: 1px solid #000000; padding:5px"><font size = '4'>[[Questionnaires|Previous]]</font></span> | ||
| <span style="background:white; float:left; border: 1px solid #000000; padding:5px"><font size = '4'>[[Welcome New Hire|Home]]</font></span> | | <span style="background:white; float:left; border: 1px solid #000000; padding:5px"><font size = '4'>[[Welcome New Hire|Home]]</font></span> | ||
| − | | <span style="background:white; float:right; border: 1px solid #000000; padding:5px"><font size = '4'>[[ | + | | <span style="background:white; float:right; border: 1px solid #000000; padding:5px"><font size = '4'>[[Employment Information Questionnaire|Next]]</font></span> |
|- | |- | ||
|} | |} | ||
Revision as of 17:35, 9 August 2019
The Biographic Information questionnaire is where you review and update information related to your identity, contact information and demographics. Much of this information is included in your application record and is information the hiring agency uses to contact you. Pages contained within this questionnaire may vary based on information needed by the hiring agency in the onboarding process.

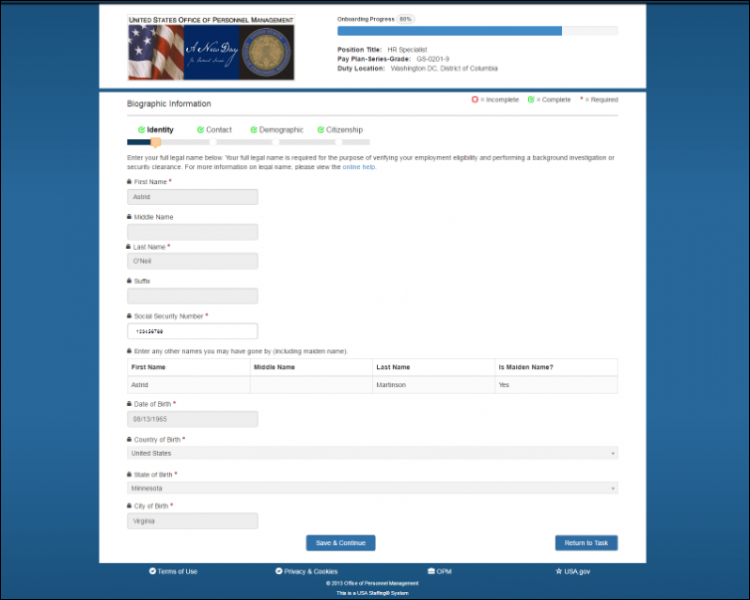
The Identity page displays your name, previous names used, social security number and date of birth. The following elements are displayed:
- First Name. This is your first name that will display on all of your onboarding forms and information.
- Middle Name. This is your middle name that will display on all of your onboarding forms and information.
- Last Name. This is the name that identifies you as a person for legal, administrative and other official purposes. A person's first legal name generally is the name of the person that was given for the purpose of registration of the birth and which then appears on a birth certificate, but may change subsequently. Most jurisdictions require the use of a legal name for all legal and administrative purposes, and some jurisdictions permit or require a name change to be recorded at marriage. The legal name may need to be used on various government issued documents (e.g., a court order). The term is also used when an individual changes their first or full name, typically after reaching a certain legal age (usually 18 or over). For instructions, see Adding an "other name" or alias to the identity page.
- Suffix. This is your name suffix (e.g. Jr. II, III etc.).
- Social Security Number. This is your social security number that will display (when applicable) on all of your onboarding forms and information.
- Enter Any Other Names You May Have Gone By (including maiden name). This is where you enter names or aliases you may have used during your lifetime.
- First Name. This is the first name for the alias or other name that you have used in the past.
- Middle Name. This is the middle name for the alias or other name that you have used in the past.
- Last Name. This is the last name for the alias or other name that you have used in the past.
- Is Maiden Name?. This indicates if the alias was a maiden name.
- Actions. This allows you to edit or delete an entry after an alias has been entered. The actions are:
- Edit. This button allows you to modify the alias listed. For instructions, see Editing an "other name" on the identity page.
- Delete. This button allows you to delete the alias listed. For instructions, see Deleting an "other name" from the identity page.
- Add Name. The button allows you to add any additional legal names you have used.
- Date of Birth. This is where you enter your date of birth using the drop-down calendar.
- Save & Continue. This button saves any changes and takes you to the next page.
- Return to Task. This is button returns you to the Task Details page. A warning message will display, “Unsaved changes will be lost. Do you want to continue?”.
The Contact page displays your email address, home address and phone information. This information may be pre-populated from your application. The following elements are displayed:

- Email Address. This is your email address to be used during the onboarding process.
- Address Line 1. This is your residential street address that will display on all of your onboarding forms and information.
- Address Line 2. This is your additional residential street address that will display on all of your onboarding forms and information.
- Apartment/Suite. This is your additional residential street address that will display on all of your onboarding forms and information.
- Country. This is the country associated with your home address that will display on all of your onboarding forms and information. Note: All fields marked with an * are required fields.
- State. This is the state associated with your home address that will display on all of your onboarding forms and information.
- City. This is the city associated with your home address that will display on all of your onboarding forms and information.
- Postal Code. This is the zip code associated with your home address that will display on all of your onboarding forms and information.
Enter Your Phone Numbers. This section is where add any additional numbers where you can be contacted.
- Phone Type. This is your home telephone number where you can be contacted.
- Phone Number. This is the international code for the home telephone number where you can be contacted.
- Actions. This allows you to edit or delete a phone number that has been entered. The actions are:
- Edit. This button allows you to edit the phone numbers listed.
- Delete. This button allows you to delete the phone number listed.
- Add Phone Number. The button allows you to add a phone number.
- Previous. This button returns you to the previous page.
- Save & Continue. This button allows you to save the information entered on this page and proceed to the next page.
- Return to Task. This is button returns you to the Task Details page. A warning message will display, “Unsaved changes will be lost. Do you want to continue?”
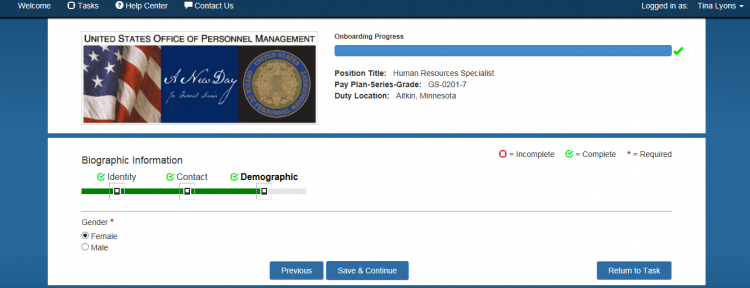
The Demographic page is where you provide additional personal biographic information. The following elements may be displayed:

- Gender. This is where you indicate your gender using the radio buttons.
- Would you like to self-identify your race and ethnicity?. This is where you would indicate your race and ethnicity.
- Have you registered with the Selective Service System?. This is where you indicate your selective service status using the radio buttons.
- Previous. This button returns you to the previous page.
- Save & Continue. This button saves any changes and takes you to the next page.
- Return to Task. This button returns you to the Task Details page for a task.
- Return to Task. This is button returns you to the Task Details page. A warning message will display, “Unsaved changes will be lost. Do you want to continue?”
| Previous | Home | Next |